
I did it. I finished the largest LEGO® build of my life. Millennium Falcon day 10 was six hours and 32 minutes of solid building. I have used the word “epic” in many descriptions of this experience. However, the word describes the process well. In total, it was 494 pages of instructions consisting of 1379 steps, resulting in 21 hours and 17 minutes of build time. Wow.

The twelfth bag set assembles some of the rear paneling for the top of the ship. Additionally, you get the Finn and BB-8 characters. It took me one hour and 32 minutes to build. Bag set 13 completes the aft section with an additional 44 minutes of build time. All of the sections hold in place using Technic rods and pins. However, they do not lock in place. If you turned the Millennium Falcon upside down, all the panels would fall off. That is okay in certain instances. For example, the panels that allow access to the interior scenes. I am a little disappointed that all the panels come off that easily though. With that said, no one is going to turn this set upside down.
In total, the Millennium Falcon took me 21 hours and 17 minutes to build.

Bag set 12 progress. 

Bag set 13 progress.
The fourteenth and fifteenth bag sets begin paneling the top front half of the Falcon. They took me 46 minutes and 52 minutes respectively. Additionally, bag set 15 assembles the side airlocks. I had some struggles with the airlocks. They are not hard to build. However, I realized that I made a big mistake earlier on. I attached one of the lower sections to the airlock corridors backwards. That was hard to go back and fix. It comes back to the issue of the underside of the Millennium Falcon being hard to work with. You cannot see what you are doing when you attach things, making the possibility of mistakes larger. Additionally, fixing the mistakes becomes harder.


Bag 16 brings the old Han Solo and Rey Minifigures. You assemble the cockpit and corridor leading to it as well. The only interior space you can access is the cockpit. You have to disassemble a number of pieces to open it up. It took me one hour and 26 minutes to build. The final bag set adds finishing touches and the last of the roof panels. One of those touches is the variation between the Empire Strikes Back model and the Force Awakens model. Essentially, you build two different satellite arrays, and a couple of small details for the front of the ship. The difference is so small I feel designers should have left it out. The back quarter of the ship I mentioned on day 4 remains empty. The extra bricks could have filled it with cargo containers or something.
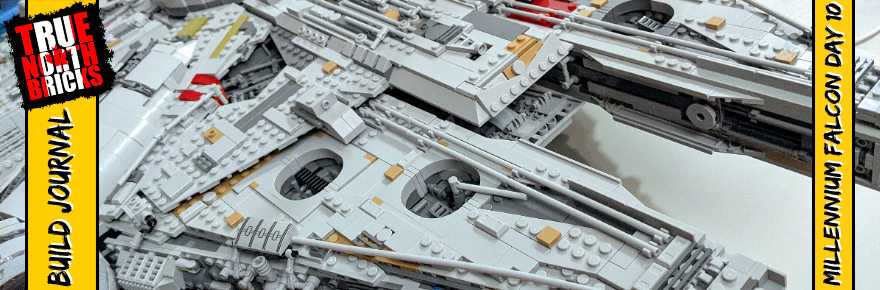
All the top panels sit loosely on the surface of the Millennium Falcon.

What an experience this was. I have to say, it was not what I expected entirely. I enjoyed the build a lot. However, I feel there was a lot of hype around this set. It was like seeing that movie everyone talks about. You have expectations going in, and the experience ends up being different. That is not necessarily bad in this case, just different. I will share more on that in my upcoming review. In the meantime, enjoy the Millennium Falcon day 10 speed build below.
Until next time,
-Tom
p.s. view other Millennium Falcon build journal entries using these links: Day 1, Day 2, Day 3, Day 4, Day 5, Day 6, Day 7, Day 8, Day 9, Day 10.


Want to support True North Bricks?
If you like the content at True North Bricks, please follow on Instagram, Facebook, Twitter, Pinterest, or YouTube for regular updates. Additionally, you can support True North Bricks by making your LEGO® (and other) purchases using the links in the menu to the right. As an affiliate of those retailers, I earn from qualifying purchases. These earnings come at no extra cost to you but help to the keep the content at True North Bricks free. Thanks for your support!