
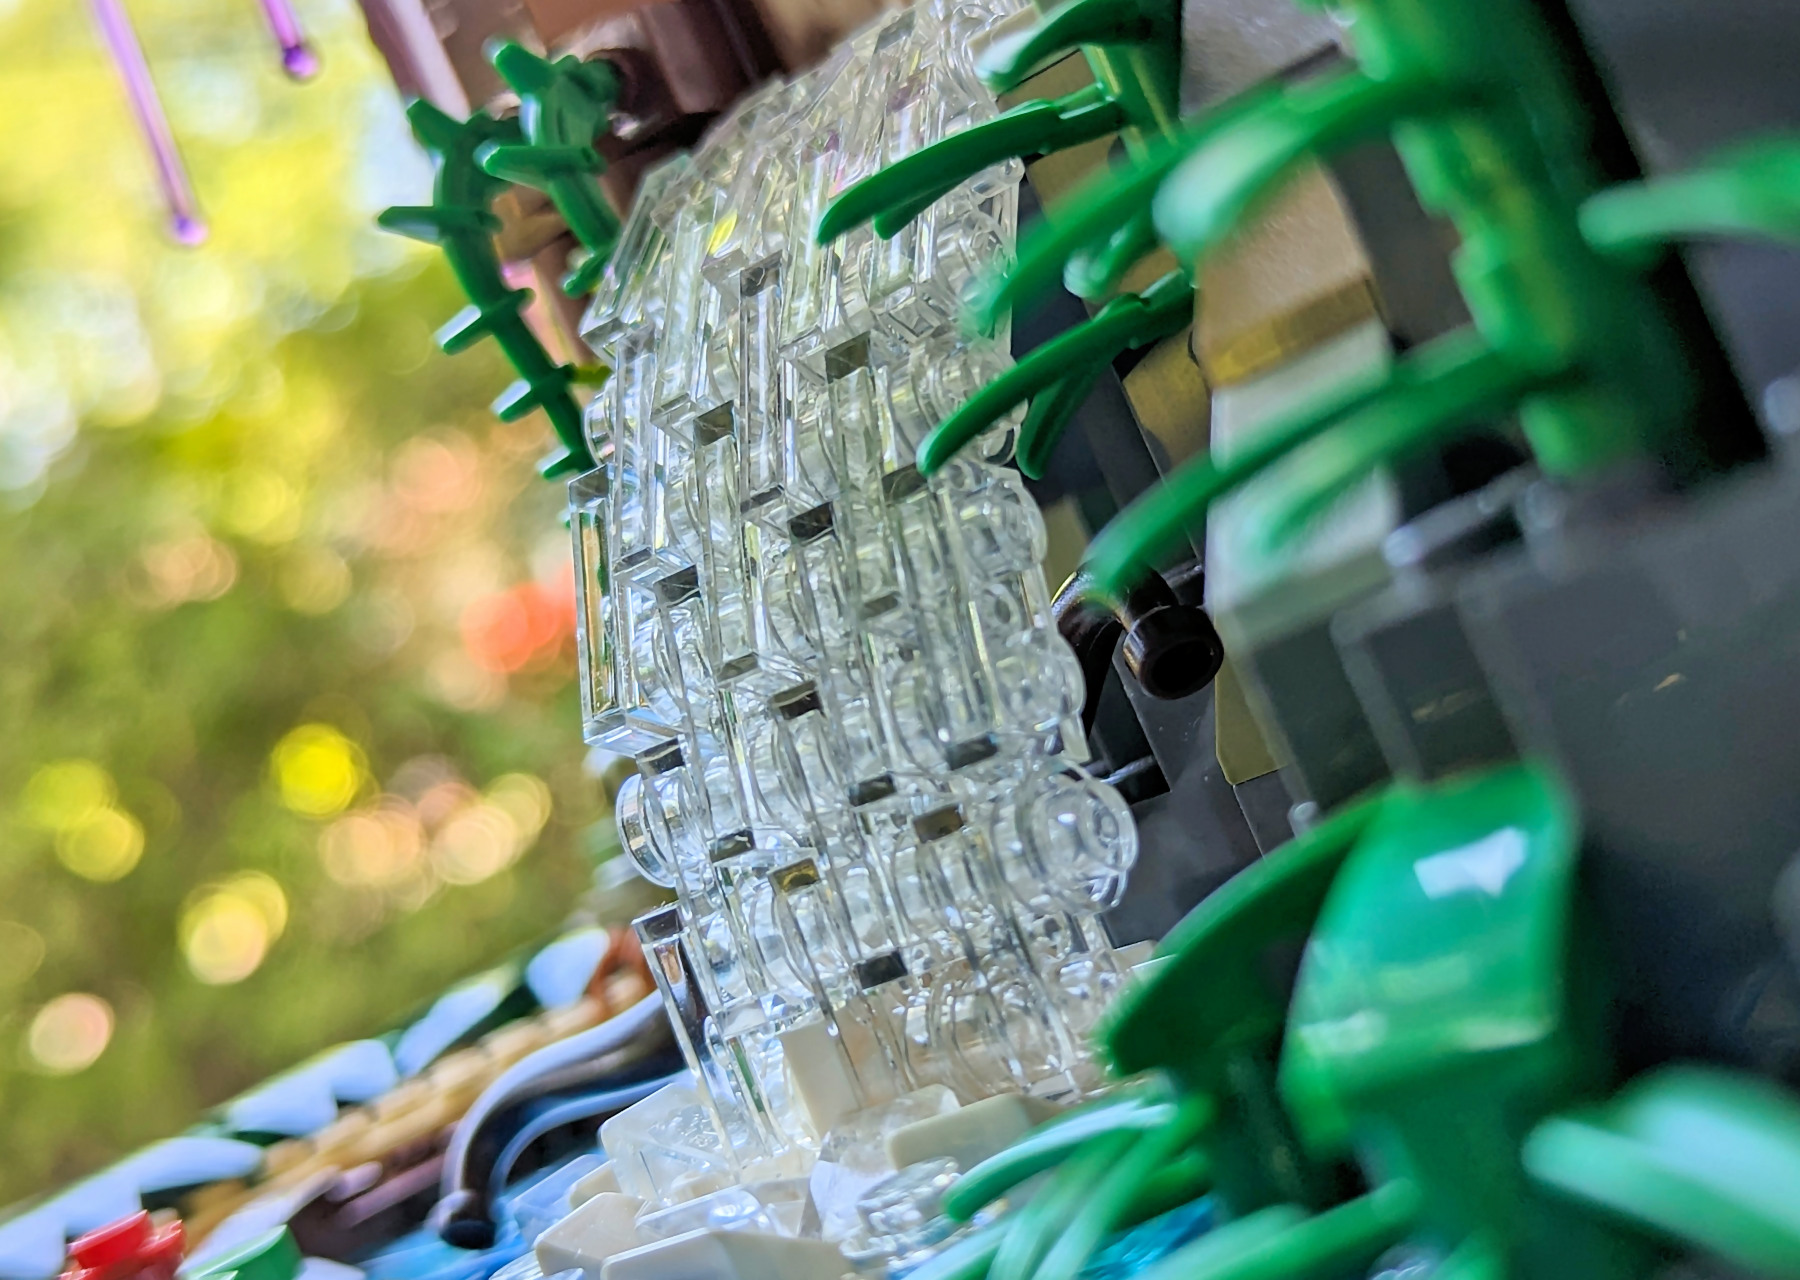
Recently, I built the centerpiece for a wedding dessert table. It featured a forested fantasy landscape complete with three waterfalls. Water is a tricky thing to build using LEGO® bricks, especially if you want to achieve a flowing look. I find translucent parts the reflect and refract light work particularly well in achieving a watery look. Here’s how to build a waterfall using LEGO® bricks based on the design I used in my fantasy landscape MOC.

First, you want to collect the needed parts. Mostly, these consist of clear 1×2 plates and clear 1×1 round plates. Of course, you can mix up the colors. In this example, I use only the clear ones. However, you can add more color for effect. For example, green or yellow make the structure look like sewage. Blue gives it a less rushing feel. I found all clear parts makes the water appear faster flowing. But play around with it and find something you like. Here’s what I used:
- 1×2 clear plates (lots and lots of them)
- 1×1 round clear plates (lots and lots of them)
- 1×1 square clear plates (just a few to close off the ends, but you can also use round plates here)
- 1×1 modified “headlight” bricks (to attach the waterfall, I used four, two at the top and two at the bottom)
- 1×1 modified bricks with stud on side (to attach the waterfall, I used two, both at the bottom)

STEP 01:
The build process is very simple. Lay a row of alternating 1×2 plates and 1×1 round plates on a flat surface.

STEP 02:
Lay a second row on top of first one. Stagger the plates so that a 1×2 plate locks a 1×1 and 1×2 on the first row together. You’ll note that the rows do not hold together at this point. Instead, you’ve build a series of small structures.

STEP 03:
Place a third, staggered row of plates on top of the second row. This locks the first two rows together. Your 1×1 round plates should be in a diagonal line. I’ve attached two pictures of the same structure below, just using different colors for clarity.


STEP 04:
Repeat the process as often as needed to fill the required space in your landscape. I built two small waterfalls and one large in my MOC.


CLOSING OFF THE ENDS & ATTACHMENT
I used 1×1 “headlamp” bricks and 1×1 modified bricks with a stud on the side to attach my waterfall to the scenery. The headlamp brick connects by the base to the sideways stud on the modified brick. However, I only used this structure at the bottom of the waterfall. I curved the “water” at the top of the structure in such a way that the headlamp bricks connected directly to the scene.

You build the waterfall around the white headlamp brick. It is worth noting that headlamp bricks come in clear as well. I used white partly because I didn’t have clear ones available when I was building. I would have need to take something else apart to get them. However, I also built a white splash area below the waterfall, and the white attachment blended in well with that. Again, I’ve shown the same structure built in different colors below for the sake of clarity. Note the use of the 1×1 square plates to close off the ends (they appear in a third color). You don’t have to use them, you can add extra 1×1 round plates instead. It is the same set-up for both the top and bottom of the waterfall.

This structure allows the “water” to bend.
I really like this structure because it allows you to bend the water. However, it only bends so much. This type of waterfall looks fast flowing because of the clear bricks, but also because it looks like it shoots off the edge of the cliff. That results limited bend in the build. If you want something that looks like it clings to the rock face, this technique is not the best. Alternatively, you can build the rock face out more around the edges of the downward flow so the waterfall doesn’t jut out as much. But it will still look fairly fast flowing in my opinion. What do you think? Have you tried this technique before, or do you prefer a different waterfall style? Let me know in the comments or reach out on social media.
Until next time,
-Tom

Want to support True North Bricks?
If you like the content at True North Bricks, please follow on Instagram, Facebook, LinkedIn, YouTube, or TikTok for regular content. Additionally, you can support True North Bricks by making your LEGO® (and other) purchases using the links in the margin to your right. As an affiliate of those retailers, we earn from qualifying purchases. These earnings come at no extra cost to you but help to keep the content at True North Bricks free.
Pin this idea for later!

2 responses to “How to Build a Waterfall using LEGO® Bricks”
Nice!
Thanks!