
I recently received a LEGO® related offer from somewhere other than the LEGO® Group. The offering was from Lightailing.com. They approached me to see if I was interested in reviewing a lighting kit for one of my LEGO® sets. The LEGO® Group does not currently produce lighting for their kits other than the standard light brick. Naturally, I was curious about illuminating my sets. I have seen many wonderfully lit up LEGO® cities others have built and shown online. However, rather than potentially place myself on the slippery slope of lighting a building, I opted to light up my 1989 Batwing with the Bricksmax lighting kit from lightailing.com.


The kit arrived nicely packaged in a professional looking box. Inside were instructions and a series of numbered little zip-seal bags. The instructions show you how to install the lights and wiring by disassembling sections of an already completed set. There are no instructions for adding the lighting as you go on your initial build. The instructions feature photographs of the set which are clear enough most of the time. However, they are not as clear as the LEGO® Group’s computer-generated images. I had to squint and really examine a few photos to figure out what was going on. Even then, I made a big mistake, but more on that later.

The brick separator was rather ineffective in removing plates.
My first advice to readers is not to rely on the standard LEGO® brick separator. The light kit instruction manual shows it in images when you need to remove bricks. However, for a set covered in plates like the Batwing, it just does not work effectively. I used a clay sculpture needle to help me separate plates. You strip entire sections of the wings. Using the brick separator will cost you time and cause you great frustration.

The Bricksmax Batwing lighting kit features wires of different lengths, some with tiny LED lights at the ends. Additionally, you gain some small plates and technic pins to replace existing parts on the set for better lighting effects. The wires go in between studs in the sections you strip of plates. The plates then return in place to hold the wires down. The kit included two colors of wire: solid black and another that was white and black. The white and black version shows up well enough in the instructions. However, the Batwing is mostly black, so the black wires get lost easily in the photos. Consequently, I missed one wire connection and half my model did not light up in the end. I had to disassemble a section again in order to figure out why the set was not lighting up. I do not like trouble shooting.

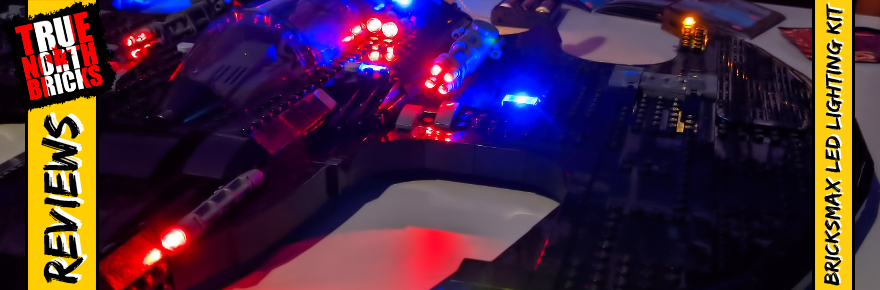
Only half my Batwing lit up on the first attempt, leading to some trouble shooting.
Personally, I found it frustrating to try to place the wires neatly. Additionally, the parts and connectors are tiny. I found my fingers fumbled with the miniscule parts, and my eyes had trouble seeing the connectors and ensuring they were going in properly. Do I need glasses? Maybe. However, that is a whole other story. The kit also includes small squares of double-sided tape. If you don’t like the LEGO® Group’s stickers, you will hate these. Each square comes off the main sheet easily, but the adhesive protector on the other side is really small and hard to remove. I used my clay needle again for that.


As I began replacing plates and bricks removed for the wiring, I became aware of why the LEGO® Group does not offer similar products. The wires in this set are very small and narrow. However, they are not so narrow that they allow the plates to fit in place perfectly over them. If more than one wire goes through a section, the problem worsens. Looking at the finished set, you do not really notice in most cases. However, close inspection reveals many small gaps or raised plates.


Wiring causes gaps between bricks and raised plates in places.
Another issue I have concerns the Batwing kit specifically. I wall mounted my Batwing. The lighting kit prevents you from wall mounting the plane again. It has to go on the stand, which I disassembled a long time ago. The battery kit is large and does not fit nicely anywhere out of sight on the set. The alternate USB wire is not long enough for wall mounting either. Additionally, I found the USB wire heats up like you would not believe when plugged in. Finally, the wires on the underside of the Batwing do not stow away out of sight. In fact, they do not even attach to anything.

This was my first attempt at lighting a LEGO® set. I was frustrated often while trying to wire the Batwing. However, the final, lit-up version looks great. I just wish it came ready to wall mount. If lighting your LEGO® sets interests you, I suggest not starting with a massive, complicated set. Lightailing.com also sells kits for smaller, simpler sets. Start small and see if you enjoy the process. If it is your thing, work your way up to the larger kits. I started big, and was able to figure it out. However, a lot of my frustration arose from inexperience with the process and having to re-do sections. Have you installed any lighting kits on your sets? What have your experiences been like? Let us know in the comments below or reach out on social media.
Until next time,
-Tom

Want to support True North Bricks?
If you like the content at True North Bricks, please follow on Instagram, Facebook, Twitter, Pinterest, or YouTube for regular updates. Additionally, you can support True North Bricks by making your LEGO® (and other) purchases using the links in the menu to the right. As an affiliate of those retailers, we earn from qualifying purchases. These earnings come at no extra cost to you but help to the keep the content at True North Bricks free. Thanks for your support!